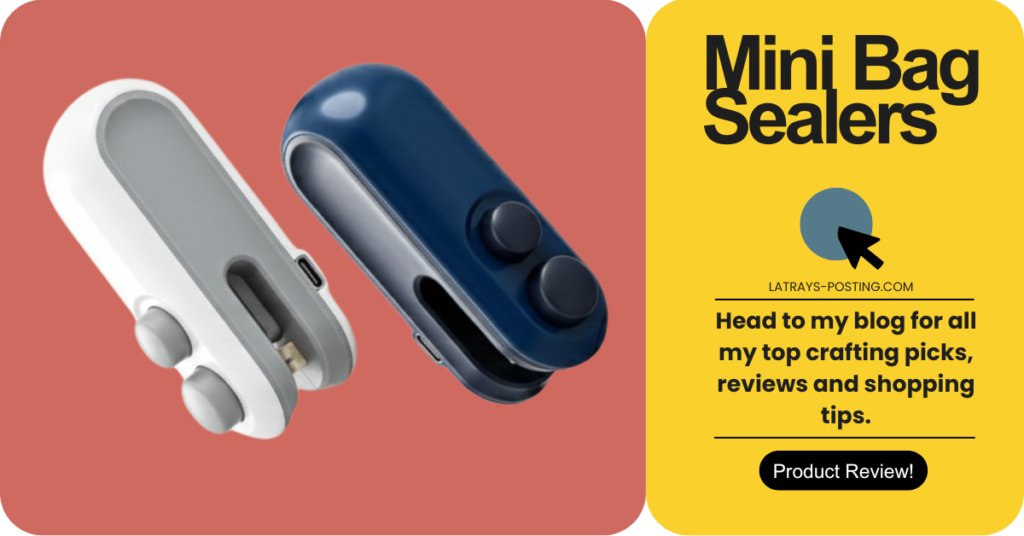
We’ve all been there, you reach for that specific bag of iridescent seed beads or ultra fine rose gold glitter, and poof, the flimsy tape or rusted binder clip gives way. Suddenly, your studio floor looks like a fairy exploded on it. I used to rely on a messy junk drawer of rubber bands and clips that never quite airtight, but then I discovered the USB-C Rechargeable Mini Bag Sealer Pair. It didn’t just organize my supplies; it changed how I preserve my materials.
This post contains affiliate links. If you make a purchase through these links, I may earn a small commission at no extra cost to you. Thank you for your support!
Precision Cutting and Airtight Protection
The genius of this tool lies in its dual nature. One end houses a sharp, integrated blade that glides through thick plastic shipping mailers or delicate ribbon packaging better than any pair of dull craft scissors. Flip it around, and you have a high heat sealer that creates a factory grade bond in seconds. Because it comes in a pair, I keep one docked to the metal leg of my craft desk via its built in magnet strip and the other in my bag. It’s compact, fits perfectly in the palm of your hand, and feels like a natural extension of your crafting toolkit.
Power That Lasts Through Every Project
Forget hunting for AA batteries in the middle of a project. These sealers are equipped with modern USB-C charging, meaning they stay powered up and ready for marathon scrapbooking sessions. Unlike older models that required a “warm up” period, these feature instant heat technology. You just clamp and slide. The airtight seal it creates is perfect for shelf life; I’ve used it to keep my air dry clay from hardening and to prevent my expensive alcohol inks from evaporating by sealing them inside heavy duty poly bags.
The Crafter’s Secret Weapon: Tips and Tricks
If you’re new to heat sealing, there’s a tiny learning curve to master the “perfect slide.” Here is how to get the most out of your new favorite tool:
- The “Slow and Steady” Rule: For thicker mylar or heavy duty plastic bags, move the sealer slowly to ensure the heat penetrates both layers. For thinner bags, a quicker “zip” prevents melting through.
- The Double Seal: If you’re storing something liquid adjacent (like wet clay or dye soaked sponges), run two parallel seal lines about a quarter inch apart for extra security.
- Practice on Scraps: Before sealing your main supply bag, snip a piece of the excess plastic from the top and test your speed.
Beyond the Bead: Creative Crafting Uses
While most people think of these for kitchen snacks, the crafting possibilities are endless:
- Custom Shaker Cards: Seal your own plastic “pockets” filled with sequins or glitter for handmade greeting cards.
- DIY Ephemera Packs: Organize your vintage paper scraps and stickers into small, clear bags and seal them for a professional, “store bought” look.
- Yarn Protection: Seal your specialty wool or silk roving in airtight bags to protect them from dust and moths.
- Paint Preservation: If you use stay wet palettes or small containers of custom mixed acrylics, sealing them inside a plastic bag between sessions keeps the paint buttery for weeks.
Stop letting your expensive supplies go to waste or spill across your desk. This pair of sealers is the small investment that yields massive organizational dividends.