

The holiday season is a magical time, and what better way to add a personal touch than with handmade decorations and gifts? You don’t need fancy tools or expensive supplies to create stunning holiday crafts. With just some colorful construction paper or sturdy cardstock, a few basic craft essentials, and a dash of creativity, you can transform your home into a festive wonderland!
Here are some delightful holiday projects perfect for crafters of all ages, complete with material lists and simple instructions.
This post contains affiliate links. If you make a purchase through these links, I may earn a small commission at no extra cost to you. Thank you for your support!
Project 1: Whimsical 3D Paper Snowflakes
Classic snowflakes never go out of style, and these 3D versions add an extra touch of elegance and dimension. Hang them from the ceiling, in windows, or on your Christmas tree for a frosty, display.
Materials:
* White or light blue construction paper or cardstock (6 sheets for one snowflake)
* Scissors
* Ruler
* Pencil
* Stapler or glue stick
* (Optional) Glitter, sequins, or small beads for embellishment
* (Optional) String or fishing line for hanging
Instructions:
* Prepare the Squares: Take your six sheets of paper and cut them into perfect squares of the same size. A good starting size is 6×6 inches (15×15 cm), but you can adjust this.
* Fold Diagonally: Fold each square diagonally in half to form a triangle.
* Fold Again: Fold the triangle in half again, ensuring the open edges are aligned.
* Make Cuts: With the double folded triangle, orient it so the longest edge is facing you and the point is away from you. Using your ruler and pencil, mark three to four parallel lines from the folded edge towards the open edge, stopping about 1/2 inch from the open edge. The lines should be evenly spaced. Now, carefully cut along these marked lines. Do not cut all the way through!
* Unfold and Connect: Carefully unfold the triangle once. You should see a square with diamond shaped cuts. Take the innermost two cut strips and bring their ends together, overlapping them slightly. Secure them with a small piece of tape or a dab of glue. This creates the first loop.
* Flip and Repeat: Flip the paper over. Take the next two cut strips (the second pair from the center) and bring their ends together, securing them as you did the first.
* Continue Flipping: Continue this process, flipping the paper after each connection, until all the strips are connected. You will end up with one finished “petal” of your snowflake.
* Repeat for All Petals: Repeat steps 2-7 for the remaining five squares of paper, so you have six identical petals.
* Assemble the Snowflake: Gather your six petals. Take three petals and staple or glue their pointed ends together. Do the same for the other three petals.
* Join the Halves: Now, join the two halves (each made of three petals) together in the center with a staple or glue.
* Secure the Sides: To make the snowflake sturdy and hold its shape, gently bring the side loops of adjacent petals together and staple or glue them. There should be three connection points on each side of the center.
* Embellish (Optional): Add glitter to the edges, glue on sequins, or string small beads onto fishing line and attach them to the snowflake for extra sparkle.
* Hang: Attach a piece of string or fishing line to one of the points and hang your beautiful 3D snowflake!
Project 2: Festive Paper Chain Garland

A true classic that brings back childhood memories, paper chains are incredibly easy to make and offer a big impact for minimal effort. They’re perfect for decorating doorways, mantels, or even stringing around a Christmas tree.
Materials:
* Construction paper or cardstock in various holiday colors (red, green, gold, silver, white, blue, etc.)
* Scissors or paper cutter
* Ruler
* Pencil
* Glue stick, tape, or stapler
Instructions:
* Cut Strips: Using your ruler and pencil, mark out strips on your construction paper. A good size is 1 inch wide and 8-10 inches long. Use scissors or a paper cutter to cut out many strips. The more strips you cut, the longer your chain will be!
* Form the First Loop: Take one strip of paper and bring its ends together to form a circle. Overlap the ends by about 1/2 inch and secure them with glue, tape, or a staple. This is your first link.
* Add the Next Link: Take a second strip of paper. Thread it through the first paper loop you just made. Bring the ends of this second strip together and secure them to form another loop.
* Continue Linking: Repeat step 3, always threading a new strip through the last loop you created, until your paper chain garland reaches the desired length.
* Vary Colors: Mix and match colors for a vibrant and festive look! You can create patterns (e.g., red, green, white, repeat) or use a random assortment.
Project 3: Charming Paper Christmas Trees

These simple, conical trees are perfect for tabletop decor, adding to a festive village scene, or even as unique place cards for your holiday dinner. They’re quick to make and look adorable in a cluster.
Materials:
* Green (or other desired colors like white, silver, red) construction paper or cardstock
* Scissors
* Pencil
* Ruler or compass (optional, for perfect circles)
* Glue stick or liquid glue
* (Optional) Glitter, sequins, small pom poms, or star stickers for decoration
Instructions:
* Draw a Circle/Arc: On a piece of cardstock, use a compass to draw a large circle, or simply freehand a large arc with a pencil from one corner of the paper. The larger the circle/arc, the taller and wider your tree will be. A half circle will yield a broader tree, while a quarter circle will yield a taller, skinnier tree.
* Cut the Shape: Carefully cut out the circle or arc.
* Form the Cone: Bring one straight edge of the cut paper over to meet the other straight edge, forming a cone shape. Adjust the overlap until you achieve the desired tree shape (taller and skinnier, or shorter and wider).
* Secure the Cone: Once you’re happy with the shape, apply glue along one of the overlapping edges and press firmly to secure it. You can also use a few pieces of tape on the inside.
* Trim the Base (Optional): If the base of your cone isn’t perfectly flat, place it on your work surface and trim any unevenness with scissors so it stands steadily.
* Decorate: Now for the fun part!
* Garlands: Cut thin strips of contrasting paper and glue them spiraling down the cone.
* Ornaments: Punch out small circles from different colored paper and glue them on as “ornaments.”
* Snow: Use a white paint pen or dab glue and sprinkle white glitter for a snowy effect.
* Star Topper: Cut out a small star from glitter cardstock and glue it to the top.
* Fringed Base: Cut small, upward V-shapes or straight fringes along the bottom edge of the cone for a more “pine needle” look.
Project 4: Personalized Holiday Gift Tags
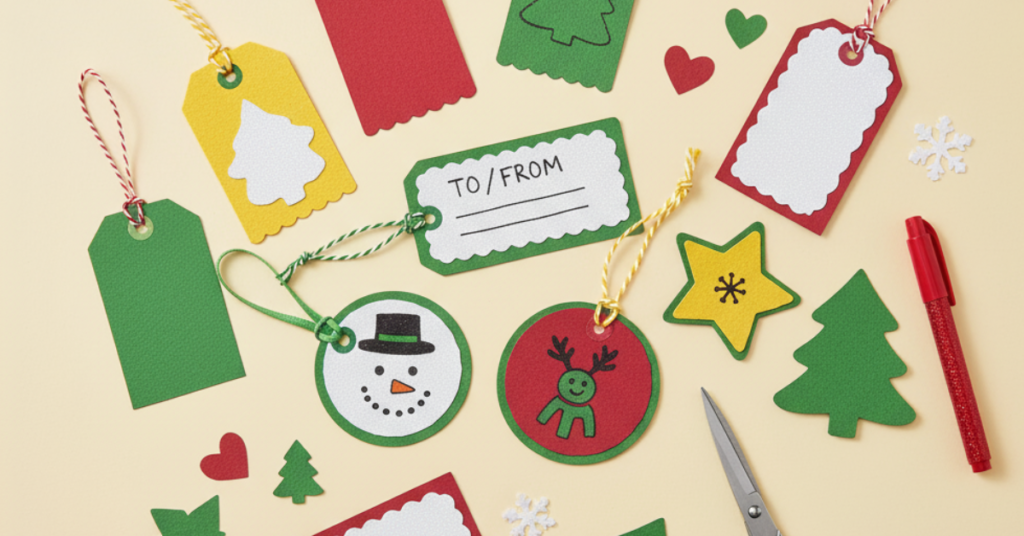
Add a thoughtful, handmade touch to your presents with custom gift tags. They’re quick, easy, and make any gift feel extra special.
Materials:
* Cardstock in various holiday colors or patterns
* Scissors or paper punch (for shapes like circles, stars, snowflakes)
* Hole punch
* Ribbon, twine, or string
* Glue stick or liquid glue
* Pens or markers (metallic, glitter, or fine tip)
* (Optional) Stamps and ink pads, glitter, stickers, small embellishments
Instructions:
* Cut Tag Shapes: Cut your cardstock into desired tag shapes. Rectangles, squares, circles, or even holiday shapes like trees, stars, or stockings work great. You can freehand these or use stencils/cookie cutters as guides.
* Tip: For a layered look, cut one shape slightly smaller than another and glue them together.
* Punch a Hole: Use a hole punch to create a hole at the top of each tag.
* Decorate: This is where you can get really creative!
* Simple & Elegant: Use a fine-tip pen to write “To:” and “From:” or a festive message like “Merry Christmas.”
* Layered: Glue a smaller piece of contrasting cardstock onto a larger one, then write your message.
* Stamped: Stamp holiday images (snowflakes, holly, sentiments) onto the tags.
* Sparkle: Add glitter glue, small sequins, or festive stickers.
* Personalize: Write the recipient’s name beautifully on the front.
* Add Ribbon/Twine: Thread a piece of ribbon, twine, or string through the punched hole and tie it in a knot or bow.